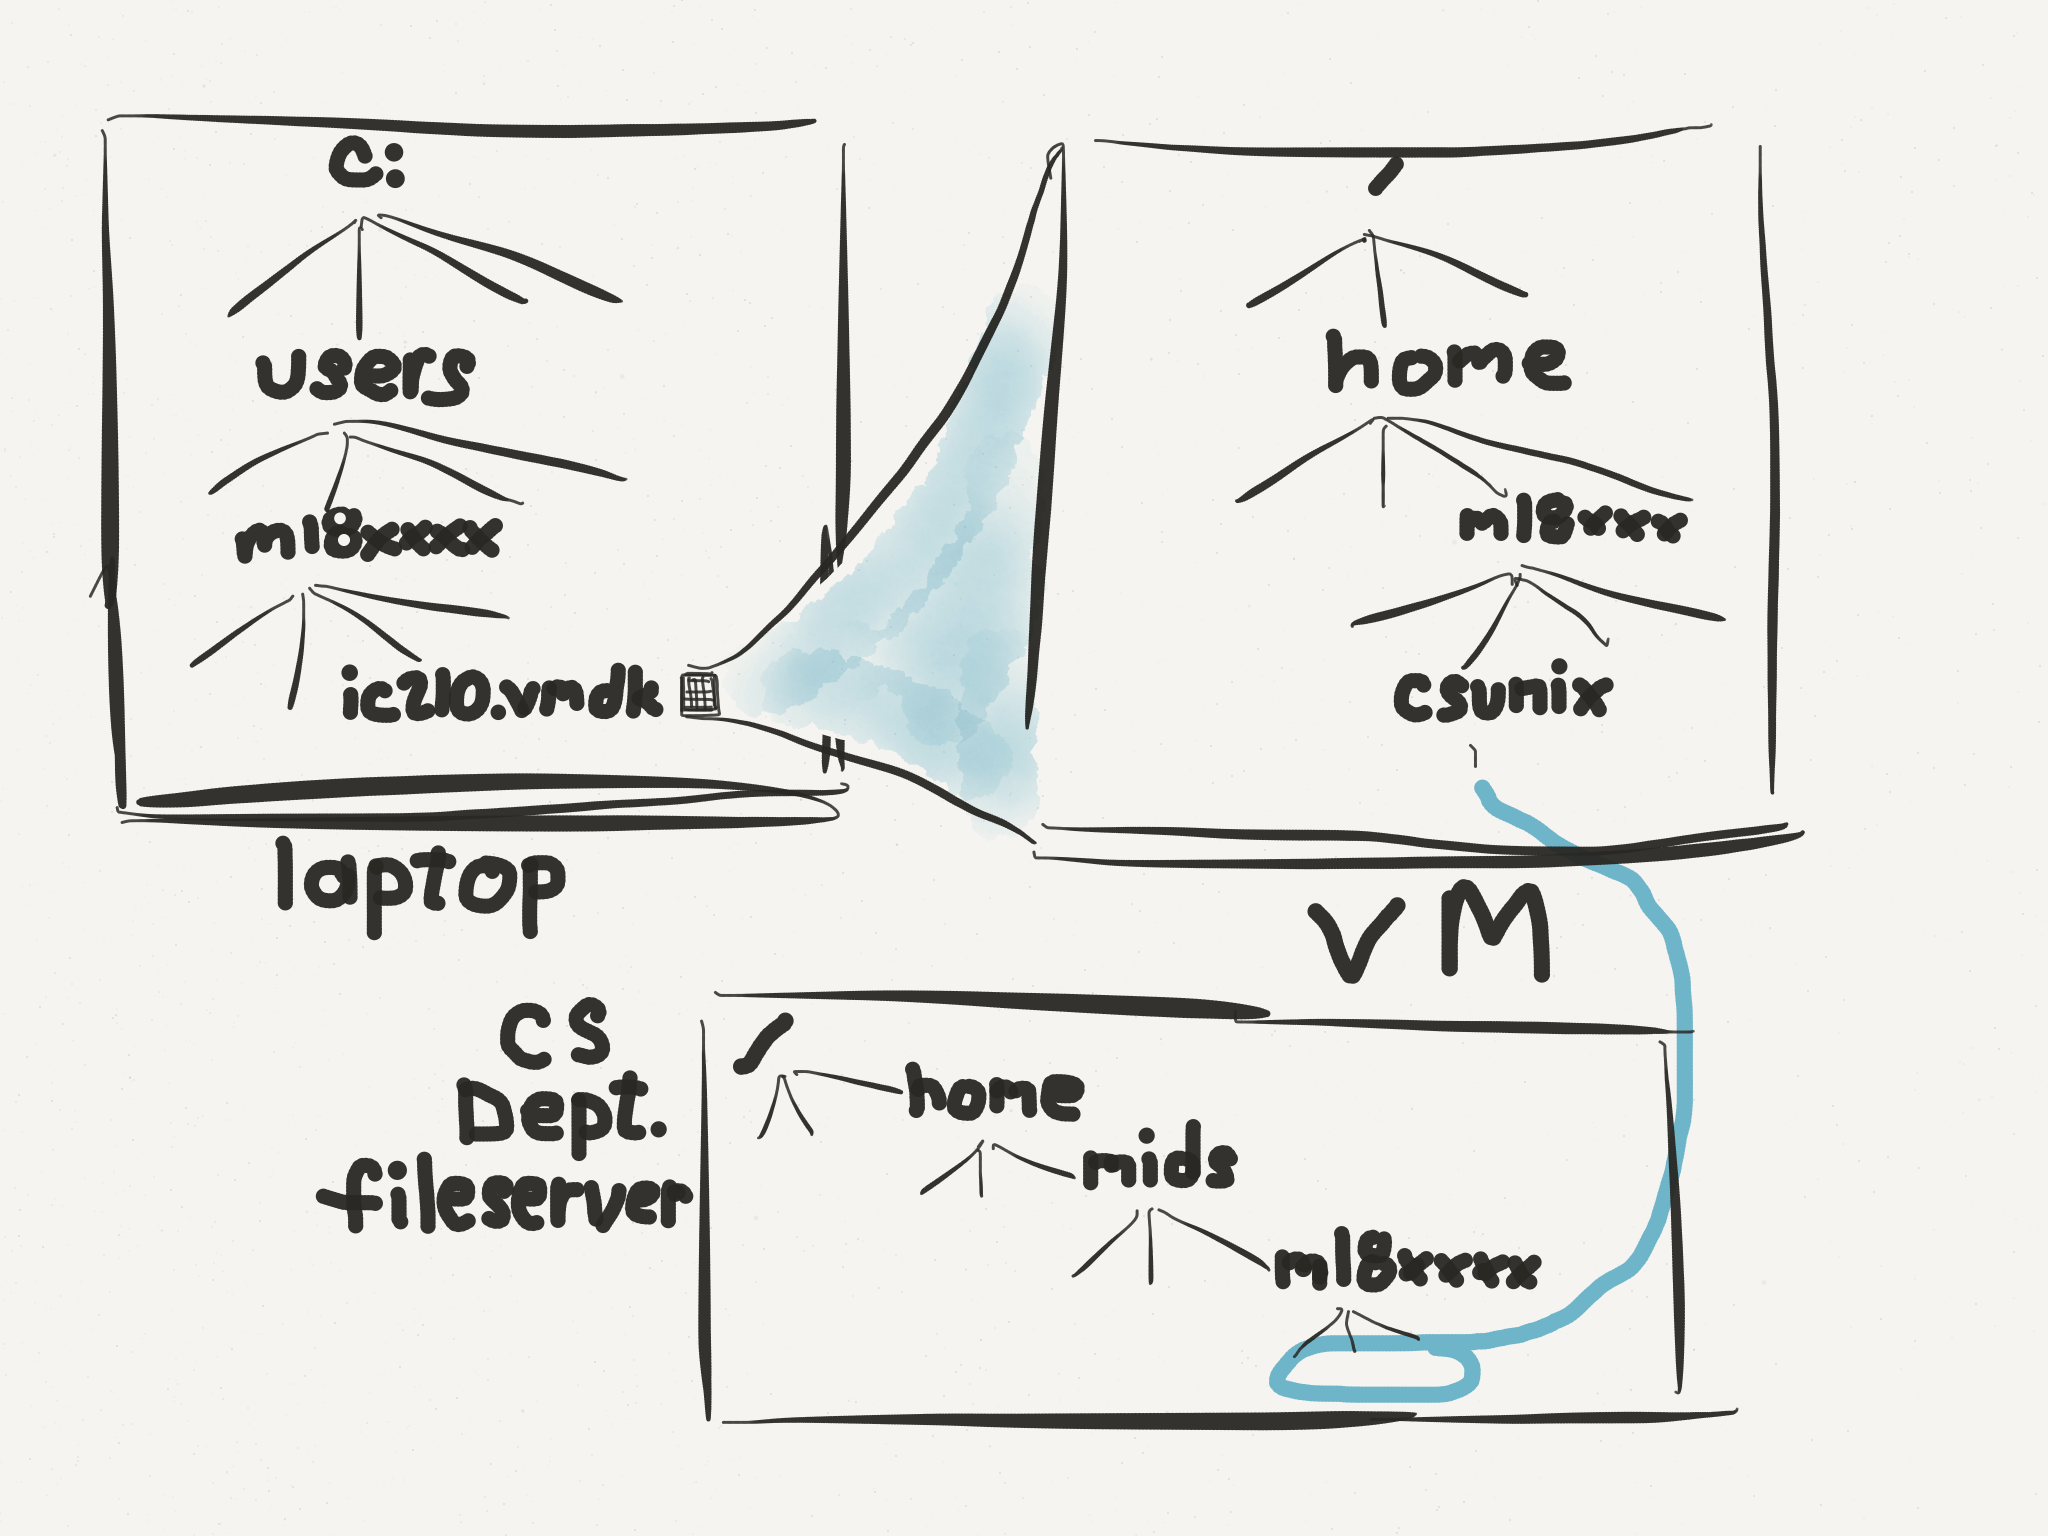
Storing stuff on your VM's filesystem is nice in some ways - you can work regardless of whether or not you have network access, for example. On the other hand, it's got some serious negatives. If your laptop dies you lose all your work. If the file on your laptop that contains the VM's state gets corrupted, you lose all your work. Finally, the work you do in the lab is not available on your VM and vice versa, unless you go back to constantly copying files back and forth. So ...
In conclusion, storing stuff in your CS Department home directory is the best option. It's backed up nightly, accessible from the computer lab and, thanks to the "csunixmount" script that's preloaded on your VMs, it's accessible from your VM - as long as you have a network connection.
csunixunmount script first.
csunixmount script and keep
everything in your CS Department home directory.
A quick activity your instructor will guide you through and explain:
1. In your VM home directory, type the ls command.  Note the directory "csunix".
   Give command cd csunix, then ls.
   Note: it's empty.  give cd .. to go back to your home directory

2. run csunixmount
   cd to csunix again and do an ls.  Now there's a file README.  Give command cat README
   NOTE: you instructor will explain what's happened and why and recall: cd, ls and cat

3. give command cd ~  (~ means your VM home directory)
   give command csunixunmont
   do ls csunix (now it's empty again)
   do csunixmount (files are back!)
1. Run csunixmount and cd to csunix directory:2. Do 'gedit README' to edit the file README. Change text to "This is my CS Department home directory." Save and close README. cat again and see what you've got. 3. Do 'gedit hello.cpp' to create and edit the file. Edit the hello world program as shown on right. Save it! 4. Compile (g++ -o hello hello.cpp) and run (./hello) NOTE: the files are on CSDept fileserver, but the program runs in your VM! 5. Do 'codeprint hello.cpp' and drag resulting file out.pdf over to Windows desktop (good for printing)cd ~ csunixmount cd csunix
1. Give commands:
                 cd ~
                 cp csunix/hello* .
                 ./hello
   Note: now the files are both on your VM and in your CSDept home directory.

2. Use cd and ls to verify they're also in your CSDept home directory

3. Make sure you're in your CSDept home directory and give command
   rm hello*

4. Verify hello.cpp and hello are still in your home directory on your VM
Another option is to "ssh" to a CS Department lab machine in order to bring up a shell whose input and output come from / go to your VM, but whose commands are executed on the lab machine, not your VM/laptop.
Ssh is not the recommended approach for this course, but it is an important tool that you'll see over and over during the course of your time here.
When you run csunixmount it asks you for your network password because you are connecting to a USNA server. We can skip the password requirement by using public/private keys (remember SY110?). You generate a key pair in your VM, keep the private key in the VM, and send the public key to the USNA server. Once you do this, future ssh or csunixmount will not prompt for a password.
   cd ~
   ssh-keygen -t rsa
When asked where to save the keys, just hit ENTER to accept the default location. When asked for a password, just hit ENTER twice to skip that requirement.
You now have a key pair in your ~/.ssh folder. Let's copy it to the lab machines:
scp .ssh/id_rsa.pub csmidn:
And now we login to the lab server ourselves for final setup:
ssh csmidn
Copy the public key to the authorized keys file:
      mkdir -p .ssh
      touch .ssh/authorized_keys
      cat id_rsa.pub >> .ssh/authorized_keys
      exit
Done! Now you can csunixmount with ease!
cd, ls, gedit, cat, cp, rm, csunixmount, csunixunmount, g++, codeprint
~ .. .