Track file format
The plaintext track filerun1.txt looks like the following:
760
38.923082 -76.560321 2017-04-02 12:00:35
38.923078 -76.560335 2017-04-02 12:00:36
38.923025 -76.560567 2017-04-02 12:00:44
38.922975 -76.560822 2017-04-02 12:00:51
...
Tracks are represented as a series of waypoints.
- The first line shows how many waypoints are contained in file
run1.txt. As shown above, there are 760 waypoints in the file. - Each waypoint contains a GPS location (latitude and longitude) and a
timestamp (date and time, down to the second).
- The GPS location is represented in degrees as decimal numbers to
fairly high precision. For example, the first waypoint in
run1.txthas GPS location with latitude 38.923082° and longitude -76.560321°. - The date and time follows the format of
YYYY-MM-DD HH:MM:SS. For example, the first waypoint inrun1.txthas date 2017-04-02 and time 12:00:35.
- The GPS location is represented in degrees as decimal numbers to
fairly high precision. For example, the first waypoint in
Dealing with GPS coordinates
Thegps.h header file and gps.cpp function definitions
file contain a struct gpsco and useful functions for storing and
finding the distance between GPS coordinates.
Note:
- Use the
gps_distfunction when you want to compute the distance between two locations -- read gps.h carefully. The formula for determining the distance between two GPS coordinates is a little complicated since our planet is round; you should be happy that you can just use this function!
Dealing with times
The timestamps for each waypoint are fully specified in the formatYYYY-MM-DD HH:MM:SS.
In order to easily deal with these, you might want to make use of some things in
the standard header library #include <ctime>. Look at Podcast Feeds Lab to remember how to use the tm
struct, mktime, and difftime functions to
calculate the difference between them in seconds.
Organizing and compiling your code
Yourmain function should go in a file called track.cpp.
We also provided a Makefile so that you can compile your programs
with all the correct libraries linked in by running:
make track
This will compile your track.cpp program along with
gps.cpp. (Don't be intimidated by the very long g++ command that
you see in the Makefile - that's why we gave you the Makefile!)
Add your own files
You are encouraged to add your own .h and .cpp
files for other structs and groups of functions you write.
If you do that, you just need to add the names of your new .h and
.c files to the Makefile at the end of
HEADER_FILES and IMPLEMENTATION_FILES.
For example, if you added mylib.h and mylib.cpp,
your Makefile should look as follows:
HEADER_FILES = gps.h mylib.h
IMPLEMENTATION_FILES = gps.cpp mylib.cpp
and then when you run make track, it will always compile
track.cpp along with any of the other .cpp files you
have in that list, along with the many libraries needed, to produce an
executable called track.
Note:
- You can create as many files as you want.
Program structure
The general program structure is described below.- Your program will start by reading a track file.
- Your program should immediately open this file and read in the waypoints in that file, saving them into an array or linked list of structs. Note: See the note in the grading section about arrays versus linked lists. You can use arrays for a maximum of 4 features (85 points max) but you need to use a linked list if you want to implement more than 4 features (up to 100 points). Make your decision now, so you don't have to go back later and modify code for features you already completed.
-
Each struct should contain the gps coordinates and the time of that waypoint.
Probably you want to use the
gpscostruct for the gps coordinates and thetime_ttype for the time. - Your program should output the name of the file and the number of waypoints read from the file.
-
Next your program will follow a series of commands.
- Most of the features ask you to add the functionality for some command.
- The
quitcommand is used to exit your program.
For example:
~$./trackFile:ride1.txtOpened ride1.txt with 1814 waypoints command:quit
Feature 1: Linked list storage
Implement the commandlinked.
To implement this feature, you have to store tracks as a linked list of waypoints and then use the linked list for the other features as well.
Once you implement this feature, your program should ignore the number at the beginning of the .txt track files and just read until the end of file. In other words, implementing the linked list feature will make your code work correctly even if the number at the beginning of the .txt file is wrong.
Your program should output the correct number of waypoints, even if the number at the begining of the file is wrong.
To document that you have implemented this feature (and make sure
your instructor looks for it to give you credit), add a function
linked to your track program that just prints out the
word “yes”, as in:
~$./trackFile:run1.txtOpened run1.txt with 760 waypoints command:linkedyes command:quit
Note: Recall that each feature can be implemented independently of the other ones and in any order. Check the other features as well and then determine when you want to implement this feature.
Feature 2: Statistics
Implement the commandstats, which reports the total distance,
total time, average speed in miles per hour, and average pace in minutes per
mile.
Example runs are shown below:
~$ ~$ |
|
Feature 3: Landmarks
The landmarks file will start with a line containing the number of landmarks, followed by lines that contain the latitude, longitude (in degrees), and name of each landmark. For example,land1.txt looks as follows:
130
57.64 -134.35 Admiralty_Island
40.7144 -74.0042 African_Burial_Ground
42.416 -103.728 Agate_Fossil_Beds
...
Your task
Implement alandmarks function that reads in a file of landmarks
(an array is fine) and reports the minimum distance on the track to each landmark, starting with
the closest landmark.
Examples are shown below:
~$ ~$ |
|
Feature 4: Fastest mile
Implement a fastest function that prompts for a target distance (in
miles) and then reports the fastest time within the track for that distance.
Conceptually, imagine yourself jogging for say 5 miles. While jogging, you wondered how fast you could run for a mile (that is, the target distance is a mile in this case). So, you ran with the top speed for a mile at some point. Now, coming back with your GPS track data, you need to extract that one-mile-segment where you ran fastest and find out the elapsed time for that segment.
Definitions (read carefully!)
See the right for example runs. |
~$ ~$ |
Clarifying the definitions
To illustrate the above definitions better, let's consider a toy example.|
Suppose that the program receives the following command:
fastest 1.1 |
Suppose the track file has 5 waypoints, and the following information (we ignore
units for simplicity) is extracted from the track file.
                              distance         time
--------------------------------------------------------
between waypoints 0 and 1       2.0             1.5
between waypoints 1 and 2       0.3             0.2
between waypoints 2 and 3       0.8             1.1
between waypoints 3 and 4       0.9             0.9
|
-
Q: What is "the target distance"?
A: 1.1 (since the command was fastest 1.1).
- Q: What is "the cumulative distance" between waypoints 1 and 4?
A: 0.3 + 0.8 + 0.9 = 2.0
- Q: What are the two way points whose cumulative distance
is at least the target distance?
Waypoints between 0 and 1 (cumulative distance 2.0) -- elpased time 1.5 Waypoints between 0 and 2 (cumulative distance 2.0 + 0.3 = 2.3) -- elapsed time 1.7 Waypoints between 0 and 3 (cumulative distance 2.0 + 0.3 + 0.8 = 3.1) -- elapsed time 2.8 Waypoints between 0 and 4 (cumulative distance 2.0 + 0.3 + 0.8 + 0.9 = 4.0) -- elapsed time 3.7
Waypoints between 1 and 2 (cumulative distance 0.3)// not qualified (too short) Waypoints between 1 and 3 (cumulative distance 0.3 + 0.8 = 1.1) -- elapsed time 1.3 Waypoints between 1 and 4 (cumulative distance 0.3 + 0.8 + 0.9 = 2.0) -- elapsed time 2.2Waypoints between 2 and 3 (cumulative distance 0.8)// not qualified (too short) Waypoints between 2 and 4 (cumulative distance 0.8 + 0.9 = 1.7) -- elapsed time 2.0 -
Q: What is the fastest time for the target distance 1.1?
A: 1.3 (that is, the elapsed time between the waypoints 1 and 3 is the least among all candidate elpased times above).
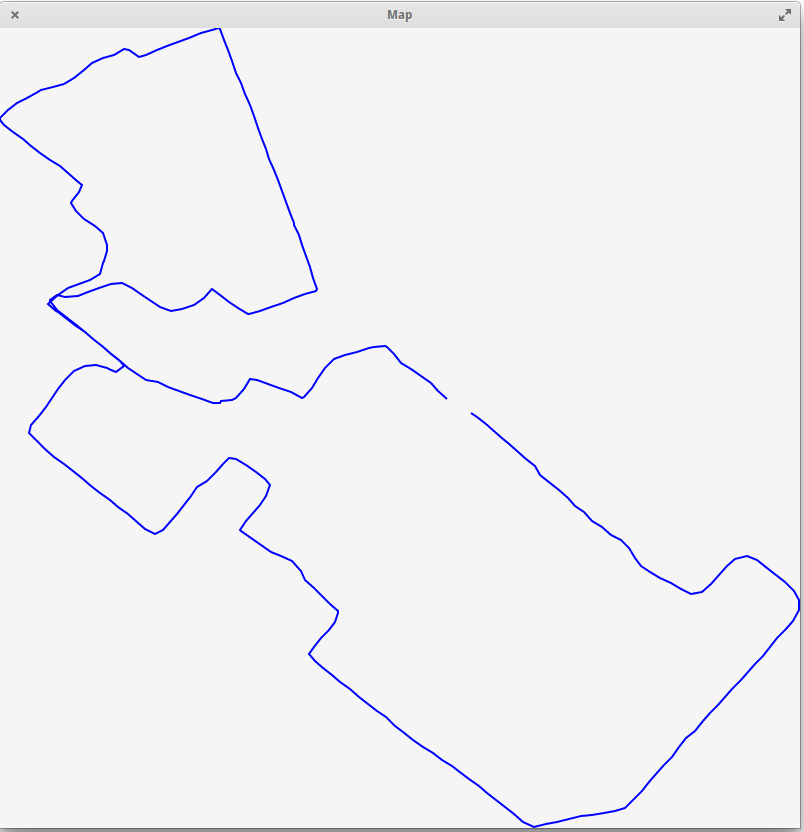
Feature 5: Visual picture
Implement avisual function that displays a visual depiction of the
current track in a new window. You don’t need to overlay it over any actual
maps, just make a line drawing with a line between each pair of consecutive
points in the track. You can check any of the gpx files in
the sample files (which match with the corresponding txt file) by
uploading to websites such as http://www.gpsvisualizer.com/. Your image will be simpler
because it’s not overlaid on Google Maps, but this should give you an idea of
what the shape should look like.
In order to pop up a window in your program, you will use the GTK+ library along with a drawing library called Cairo.
These are really big libraries that are used to create many Linux applications, and using them and reading the documentation can be difficult. That’s part of what this assignment is testing!
Sample GTK program
To help get you started, check out this example program gtkexample.cpp that opens a window in GTK and draws a line in the window. To compile this program, just download it to your project directory and then do
make gtkexample./gtkexampleWarning: If you get an error message when running ./gtkexample on your laptop and a window does not open up, your VcXsrv is likely not running. See the instructions under "Launch VcXsrv" section in the course setup to launch the server (you only need to do steps 1 and 2)
Notes
- Your drawing area should be 800x800 pixels.
- In GTK+, the pixel (0,0) is at the top-left of the area. Play around with the example to get a sense of the pixel orientation.
- In the example program, the
on_draw_eventfunction actually draws the line. The way that it knows where to draw the line is based on the last parameter,gpointer user_data. Think of thegpointertype as a “pointer to anything” which can be casted into a specific type. In this program, it is a pointer to a linked list of three node structs with x and y data members, but in your program it could be a pointer to a different kind of linked list node, or an array of structs, or a pointer to some other struct. - Use whatever colors or thicknesses you like. Your instructor will check your work manually.
- You will have to first find the “bounding box” of what is the minimum and maximum longitude and latitude in your track. (see lab03)
- Then you’ll have to convert each latitude and longitude so that they correspond to pixels in the 800x800 grid, and draw them! So the leftmost waypoint on the track should have pixel x value 0, the rightmost waypoint should have pixel x value 799, and similarly for the topmost and bottommost waypoints.
|
|
Shrinking the size of shapes
Please run the following command:export GDK_SCALE=0.5For example, to execute the above sample run with showing the picture in a smaller scale:
~$export GDK_SCALE=0.5~$./trackFile:run2.txtOpened run2.txt with 327 waypoints command:visualcommand:quit
Feature 6: GPX file input
Note: You are required to use a linked list for this feature!
Modify your program so that if the user enters a filename that ends with
.gpx, then an alternate format is accepted.
GPX files
GPX is a real file format used by many fitness tracking apps and devices. If you have a Garmin or similar device, you can download any of your tracks as.gpx files. The full
specs are here, but since we just want the location and time for each
waypoint, it will be a bit easier.
The file format for GPX files is called XML.
XML format (read carefully!)
XML is similar to HTML if you remember that from your SY110 class. Each part of the XML has some "attributes" and some "children". For example, consider the following XML document.
<outer>
  <inner attribute1="cool" font="times" attribute3="yellow">
    <item1>Item 1 contents</item1>
    <item2>Item 2 contents</item2>
  </inner>
</outer>-
There is one "root" element with name
outer. -
The
outerelement one child. That child has nameinner. -
The
innerelement has three attributes with namesattribute1,font, andattribute3. - The
innerelement has two children with namesitem1anditem2, and they each have some contents.
Run xmlexample.cpp with GPX files
This example program xmlexample.cpp will read in an XML file like the small example above and report on the various elements and attributes. To compile it, typemake xmlexample
-
Run this program wih any of the sample
gpxfiles. Check out the actual contents by directly opening thegpxfiles in your editor. See how that file format works. -
Basically:
- The root element is
gpx. - The
gpxelement has a child calledtrk. - The
trkelement has a child calledtrkseg. - The
trksegelement contains the actual waypoints you care about. - Each element in
trksegis atrkptwith some attributes and children that specify the latitude, longitude, and time for that waypoint, in order.
- The root element is
- All of those elements also might contain some extra information. Your program should ignore any extra information and just try to get the waypoint information for the track, and save that in the same way you have saved the plaintext track information from before.
-
Important:
In order to better see how
xmlexample.cppworks (and learn the XML format better), you probably need to play around with the GPX files in a bunch of different ways. Try creating a new GPX file or modify the existing GPX files and run the program on them.
Write your code
Thexmlexample.cpp program uses a standard library called libxml2 in
order to read the XML files. The libxml2 library parses files as a
“tree” of XML elements, which are naturally nested inside each other.
- The documentation on libxml2 is here and in particular you will be most interested in the tree section.
-
Study
xmlexample.cpp. You probably need almost all of it in your code. -
Please look back at the code from Podcast Feeds Lab
(specifically the file
rss.cppthat was provided to you) which used libxml2 library for reading podcast feeds. - I am not telling you exactly how to do everything here. Part of your assignment is to figure this out! But please don’t hesitate to ask your instructor for help whenever you aren’t making good progress.
- Of course I hope this goes without saying, but you may not assume that the same file with a .txt extension exists. You really have to read and process the gpx file!
Example runs
~$./trackFile:ride1.gpxOpened ride1.gpx with 1814 waypoints command:quit
~$./trackFile:ride2.gpxOpened ride2.gpx with 4584 waypoints command:quit
~$./trackFile:ride3.gpxOpened ride3.gpx with 13188 waypoints command:quit